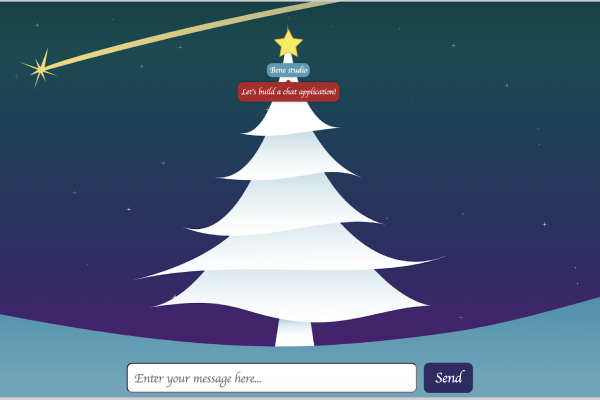
Build your own Christmas chat tree

At bene : studio we love knowledge sharing to help the community of professionals. With 10+ years and 100+ projects behind our backs we have experienced a lot. This is why we have launched a knowledge base on our blog with regular updates of tutorials, best practices, open source solutions.
These materials come from our internal workshops with our team of developers and engineers.
Pardon the interruption, we have an important message!
We are looking to expand our team with talented developers. Check out our open positions and apply.
Build your own chat using React with Server-Sent Events & OneSignal
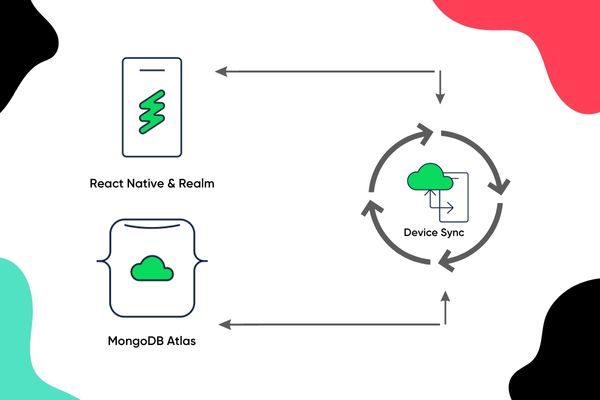
Everybody chats all day, so it’s time to learn how you can create a working chat application in 2 hours with push notifications using React, SSE (Server-Sent Events) and OneSignal on Heroku! This project first appeared at one of our popular tech workshops.
Repository to work with: https://github.com/benestudio/christmas-chat-tree
Demo: https://christmas-chat-tree.herokuapp.com/
Everybody is chatting all day, so it’s time to learn how you can create a working chat application in just a few hours!
REQUIREMENTS:
Basic Setup:
- Working Git installation.
- NPM and NodeJs installed.
- Your Favorite IDE
- Heroku account and client working on your machine
- OneSignal account
Be Ready For:
- React (not covered)
- Styled Components (not covered)
- Redux
- Express
- Heroku
- OneSignal
When you deploy the project on Heroku, you will need the following Config vars:
- HOST: the URL of your heroku app, like https://christmas-chat-tree.herokuapp.com/
- ONESIGNAL_API_KEY: can be found on Onesignal’s Account & API keys page, section REST API keys
After cloning the repository, you can check the branches of the project. There are 5 branches. The master branch contains the final version of the app, and for the other 4 branches you can find the starting points for the 4 exercises. You can check the master branch first, or challenge yourself and solve the tasks by searching for TASK 1, TASK 2, etc. on the corresponding branches.
Task 1 & 2 is about the server-sent events and task 3 & 4 is about the onesignal push notifications. The odd numbered tasks are working with the client side and the even numbered tasks work with the server side.
Task 1: Connecting to the event source and parsing events
If you are interested in challenging yourself, please check out branch task-1, search for TASK 1 and try to solve the code based on the comments.
Here is the solution:
First we connect to the event source, which is a GET API endpoint on the server. This is transformed into a continuous event-stream response. Then we start listening to the messages and parse them based on their type, dispatching the appropriate action.
You can already try it out, the API calls will connect to the demo server.
Task 2: Event source endpoint and broadcasting events
For a challenge, please check out branch task-2, search for TASK 2 and try to solve the code based on the comments.
Here is the solution:
Part A
First we write a success header (200) along with the content type and cache control to make the request into a continuous event-stream. Then push the response with the new id to the streams which are the connections of our current users. Finally, send a welcome message stating that the connection was successful. (This is not handled by the frontend, but a nice to have for debugging.)
Part B
Refreshing the user list when a user logs in or logs out. We iterate through all the streams we have and send a similar event like the “connected” type, just this time attaching the user list.
Part C
Similar to the previous part of the task, but with a different type and data.
You can deploy the code now to your heroku application and check it out with your friends, use multiple browsers or just run it in your local environment. Don’t forget to set the HOST at the config vars.
Task 3: Configuring the Onesignal application
In this task you should create your own Onesignal application and copy the client key at Task 3A, and the onesignal SDK script at Task 3B.
When you create a new app on Onesignal, choose the Web Push option. On the configuration page you can leave all as it is with the exception of Site Setup.
Please note that you need HTTPS for the push notification to work properly. Hopefully Heroku provides it automatically.
After creating the app for Task 3A you can get the app id from the URL of the page: /apps/<yourAppId>/…
Use the “Add Code to Site” section for Task 3B, but replace the app ID (Task 3A) with “onesignalAppId”. We refactor it so we can use it both on the client (rendering) and server side.
Task 4: Broadcast messages to Onesignal app subscribers
Here is the solution:
Click here to find the can find the documentation.
After someone sends a message we simply broadcast it to push notification subscribers. You can play with the segments, for this example we used the “All” option. You have to localize the messages, we used the default english as “en”. The headers should contain the ONESIGNAL_API_KEY, which can be found on Onesignal’s Account & API keys page, section REST API keys. We placed that on Heroku, under settings, config vars.
It’s time to push your code and check if the notifications are working on your Heroku site.
Did you have fun?
Want to ask some questions? Share them with us via e-mail to partner@benestudio.co and we can set up a talk with our engineers.
Fancy working for the studio where you can work on international projects and write articles like this? Check out our open positions!
Looking for a partner for your next project? Check out our services page to see what we do and let’s set up a free consultation.


