Using MongoDB App Services in a React Native app
⚠️ Important Notice: Deprecated Technology ⚠️
This article describes the use of MongoDB Device Sync, which has been deprecated. While the information here is no longer up to date, it remains available as a historical resource to showcase our expertise in leveraging cutting-edge technologies at the time of publication.
For the latest best practices and modern solutions, please visit the official MongoDB documentation or explore our blog for up-to-date insights.
At bene : studio, we love knowledge sharing to help the community of professionals. To share our 10+ years of experience we have launched a knowledge hub on our blog with regular updates of tutorials, best practices, and open-source solutions.
Pardon the interruption, we have an important message! We are looking to expand our team with talented developers. Check out our open positions and apply.
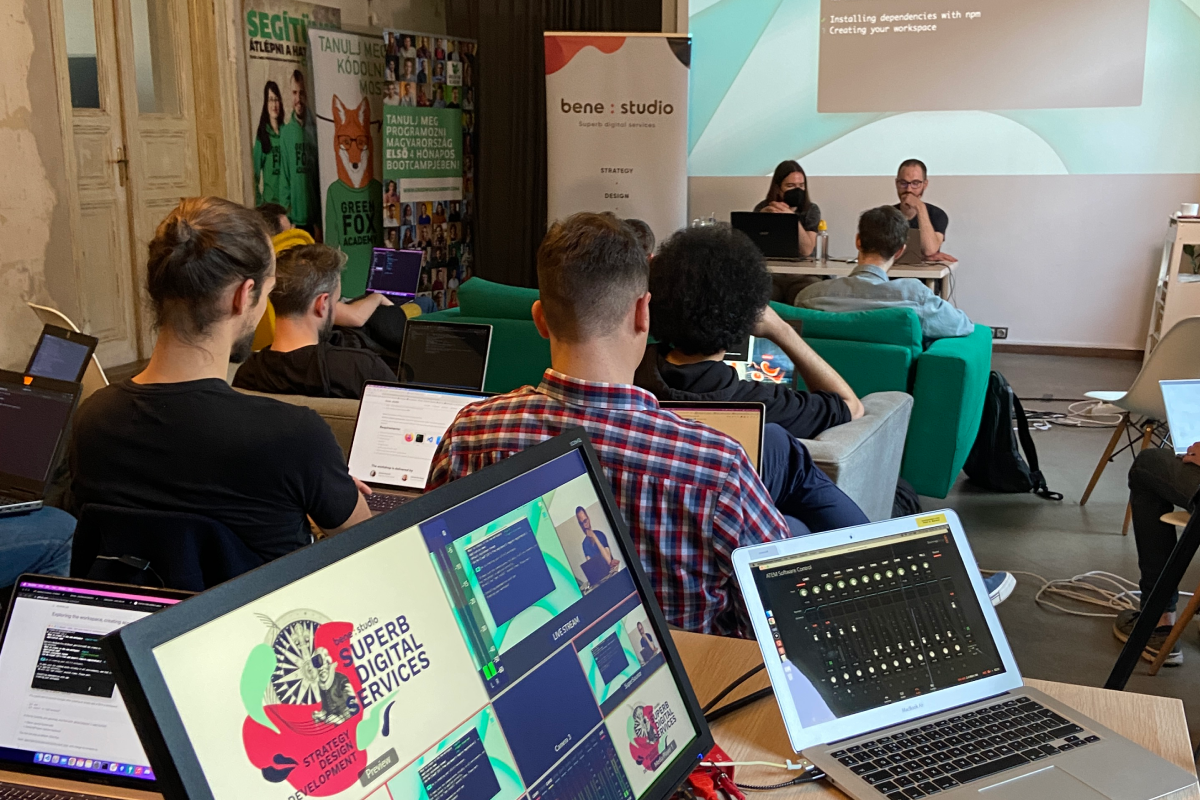
This article is based on a live workshop we held in March 2023. Follow the steps in this article to complete the workshop at home! Pro tip: Watch the workshop video to follow the steps in the article more easily!
Introduction
MongoDB is a popular NoSQL database often used in modern web and mobile application development. One of the key features of MongoDB is its ability to work with JSON-like documents, making it well-suited for use with web technologies such as React Native.
React Native is a popular framework for building mobile apps using JavaScript and React. It allows developers to build mobile apps for both iOS and Android using a single codebase, making it a great choice for cross-platform app development.
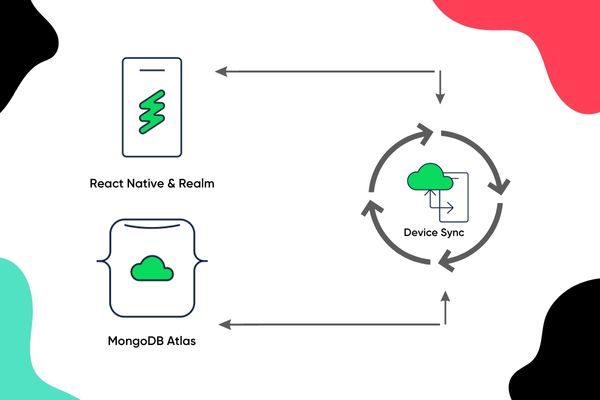
In addition, MongoDB App Services’ built-in support for real-time data synchronization and change streams makes it an excellent choice for building real-time, collaborative mobile apps. This feature allows multiple users to access and update the same data in real time, making it possible to build apps that feature real-time notifications, live updates, and other features that require real-time data synchronization.
In this series of articles, we are going to create a color set editor application where users can create their own color sets, modify their colors and share it with other users. In this project besides the technologies listed above, we are going to use Material UI. Thanks to App Services, we won’t use any other backend services.
Completing the series, you will learn how to:
- Integrate React Native with MongoDB App Services
- Defining schema in Realm, App services and MongoDB
- User authentication
- Device Sync
- Custom functions
- Triggers
- HTTPS Endpoints
- Debugging
Trying out the application
Clone repository
Please clone the repository from bitbucket, then use “npm install” and “cd ios && pod install” if you would like to try it out on iOS.
Make a copy of config.ts
Let’s find the file src/config.example.ts and make a copy with the name config.ts. Later when you create your own MongoDB cluster, you can modify the ID and URL here.
Run the application
Time to try out how the application works. Run “npm run ios” or “npm run android”, but you may have to use Xcode or Android studio. The app will use Bene studio’s MongoDB app service, which will be changed later. You can try registering and creating a new color set in the app.
MongoDB and authentication
To create your own cluster, let’s create a MongoDB account at cloud.mongodb.com.
Set up a new MongoDB Atlas account
Create a new project

Then add members to the project if necessary, then click Create Project.
Create a cluster
Click Build a database. On the next screen, select the free Shared option from the list and click Create. On the configuration screen, set the cluster name to something like ColorsetEditor, then click Create Cluster.
Security Quickstart
Provide a username and a password for the database and click Create User.
For IP Access, enter 0.0.0.0/0 to allow any IP to connect, or you can add your current IP also, then click Add Entry and Finish and Close.
MongoDB Compass
For managing the DB, we will use MongoDB Compass.
To connect to your database:
- In MongoDB Atlas, go to the Database page and click Connect on the cluster
- Select Connect using MongoDB Compass
- Download Compass and install it
- Copy the connection string to the clipboard
- Open MongoDB Compass and click New Connection
- Paste the connecting string to the URI field and click connect
- Don’t forget to replace the <password> with your real password
Creating a database
In MongoDB Compass:
- Click the + button next to the Databases
- Enter colorset-editor for Database Name
- Enter Users for Collection Name
- Click Create Database
You can open the created database on the left and check that the Users collection is empty. We will populate it during the registration process.
Creating an App Service
To create HTTPS endpoints for Registration, we have to create an App Service. It will help us to connect the React Native application to the database.
In MongoDB Atlas:
- From the Data Services tab navigate to App Services
- In the popup, select Build your own app and click Next (this popup appears only when you creating your first App Service)
- Name your application like ColorsetEditor
- Click Create App Service
Registration and Login
Registration
Let’s create an Endpoint to handle Registration:
- In the sidebar under Build section navigate to HTTPS Endpoints
- Click Add An Endpoint
- For Route enter /registerUser
- Under Endpoint Settings, Operation type, copy the URL of the endpoint for later use
- For Function select + New Function
- For Function name enter registerUser
- For the function body insert the following and click Save Draft
In the function, we use the username as a user input and check whether the username already exists or not. If it is, then we return with an error. Otherwise, we create the user.
NOTE: We do not use passwords in this project to make the tutorial easier.
To deploy your changes, click Review draft and deploy in the blue box.
Authentication function
Let’s set up the authentication:
- In the sidebar under Data access section, navigate to Authentication
- For Provider, click on Edit in the row of Custom Authentication Function
- Make sure the Provider is enabled
- For Function select + New Function
- For the function body insert the following and click Save
In the function, we check whether the user exists in the database or not and return the userId. It will be used when the Realm is trying to authenticate to the App Service.
Connect the Application to the App Service
To show a different screen (later the navigator) when the user is logged in and enable the login functionality, we set up the following providers. It will show the Login screen as a fallback while the user is logged out and will render the Dashboard once the user is logged in.
There are 3 providers inside it:
- App provider: providers the useApp hook, requires the application ID (app service id)
- User provider: providers the useUser hook, requires a fallback component, which is the Login screen
- Realm Provider: provides the useRealm, useQuery and useObject hooks, requires a sync configuration
Authenticate to App Service
To connect the app to the newly created endpoint, add the following codes:
The app.logIn function calls the App Service, which uses the authFunc function we wrote in the previous step.
NOTE: You may have to modify the ENDPOINT_BASE_URL and the APP_ID in the config.ts to connect to your App Service.
Colorset schema
Schemas for Realm Context
To set up the database in the RealmProviders.ts file, you need to provide the schemas.
Colorset Schema
The schema always has to contain the name of the schema and its properties. The primaryKey is optional.
Working locally
You can already try to create color sets, but they won’t be synced to the App Service yet. You will have to temporarily remove the sync prop in the RealmProvider to bypass the error.
Collection in MongoDB
To enable the sync of the collection in later steps let’s create a new collection in our MongoDB Atlas database.
- In MongoDB compass, click the + button next to your database
- For Collection name, enter Colorsets
- Click Create Collection
Device Sync
To enable sync data between Realm and MongoDB let’s set up the Device Sync.
Enabling Device Sync
- In the sidebar under Build section navigate to Device Sync
- Click Start Syncing
- In the dialog, enable Development Mode
- Select Cluster and Database to sync
- In Configure Quaryable Fields, add “owner_id” and “viewers” fields
- Click Enable sync
Access Rules
- In the sidebar under Data access section, navigate to Rules
- Click Default roles and filters below mongodb-atlas
- Click + Add role on the right
- From Other presets select readOwnWriteOwn
- Click Add preset role
- On the new role click the options menu (3 dots)
- Click Edit role
- Scroll down to Document Permissions
- Change the Read role to the following and click Save
With this role, each user will be able to read and write their own data (owner_id), and those who are added to the viewers’ array of userIds will be able to read others’ color sets.
App service schema
You can now enable the sync in the RealmProvider. Once it starts syncing, the schema should be available on the App Service.
Let’s verify it:
- In the sidebar under Data access section, navigate to Schema
- Click the Colorsets inside your database
- Check whether the JSON Schema is identical to this file:
Colorset list in action
You can now try the device sync. If you create a new color set, it should be visible in MongoDB Compass under the Colorsets collection. You can also try logging in on a different device and should see the same list.
The querying of the Realm database looks like this on the React side:
Color set CRUD
Create a new color set
To create a new document of a color set you have to call the realm.create method inside a realm.write callback.
Read the color set from Realm
To read a document from Realm, you can use the useObject query. Make sure to use the IColorset as a template type.
Edit a color set
To make edits to a document, you have to modify the properties of the object inside a realm.write callback.
Delete a color set
To delete a document, you have to call the realm.delete method with the object of the document you are to delete inside a realm.write callback.
Sync App Service userId with Triggers
To utilize the Access Rules we set up previously, we need to have the App Service userID listed in the viewers object. This userId is not the same ID we have in the Users collection. To make them accessible, we need to assign the App Service userIDs to the User documents. To do this, we have to set up a new trigger in App Services.
- In the sidebar under Build section navigate to Triggers
- Click Add a Trigger
- For Trigger Type select Authentication
- For Name enter appServiceUserIdSync
- For Action Type select Create
- For Providers select Custom Function Authentication
- For Function select + New Function
- For Function name enter appServiceUserIdSync
- For the function body insert the following and click Save
Before trying it out, please delete the existing users in the MongoDB and in App Services:
- Open MongoDB Compass
- Select the Users collection
- Click on the trash icon next to the user(s) and confirm with the Delete button
- Go to MongoDB App Services
- In the sidebar under Data Access section, navigate to App Users
- Click the options menu at the end of the user entries (3 dots) and select Delete User and confirm
Now let’s try to register a new user in the react-native app. If you refresh the Users collection in MongoDB Compass, you should see the appServiceUserId on the newly created document. We will use it when sharing a color set with other users.
Sharing color sets with other users
Search usernames
You can find the API call to get the users in the following file:
src/Screens/Dashboard/ColorList/ShareItemDialog/ShareItemDialog.tsx
Let’s create an endpoint in App Services to serve the users.
- In the sidebar under Build section navigate to HTTPS Endpoints
- Click Add An Endpoint
- For Route enter /searchUsernames
- For Function select + New Function
- For Function name enter searchUsernames
- For the function body insert the following and click Save Draft
Get shared usernames
When we display the usernames of the users the color set has already been shared with, we only know the App Service userIDs of those users. To get their usernames, we have to make an API request to the App Services.
- Follow the steps from the previous section
- For Route and Function name user getUsernames
Selecting a user for sharing
To share a color set with a user, you have to follow the same rules as when we edited a colorset in the CRUD section.
Do you have questions?
Please send them to partner@benestudio.co, and we are happy to set up a talk with our engineers.
Are you looking for a partner for your next project? Check out our services page to see what we do, and let’s set up a free consultation.
Join our Engineering Team, we are hiring!