Comparing Reactotron & React Native debugger
At bene : studio, we love knowledge sharing to help the community of professionals. With 10+ years and over 100 projects behind us, we have a vast amount of experience. This is why we have launched a knowledge base on our blog with regular updates of tutorials, best practices, and open source solutions.
These materials come from our internal workshops with our team of developers and engineers.
Pardon the interruption, we have an important message!
We are looking to expand our team with talented developers. Check out our open positions and apply.
Introduction
“If debugging is the process of removing software bugs, then programming must be the process of putting them in.”
Edsger W. Dijkstra
I believe that everybody can agree with the quote above. If you have ever been part of a software development project or simply just did coding for fun, then you know that debugging is a never-ending problem in a developer’s life. The question is not if we can get rid of bugs, but rather how quickly and effectively we can do that. Several different debugger applications and methods exist, but we are going to take a look at the ones used for React Native.
This article presumes that the reader has basic knowledge of both React and React Native. Inside the given repository, there is a simple React Native application configured with two of the debuggers.
React Native Debugger
Let’s start with this one. As the name suggests, it is made specifically for debugging React Native applications. I’ll refer to it as RND for short. As it is mentioned on its public GitHub repository: “The standalone app based on official debugger of React Native, and includes React Inspector / Redux DevTools”. Let’s deconstruct this statement a bit.
It being a standalone app means that it’s not part of the React Native framework. Instead, you have to install it separately. The app itself is built with Electron, so it can be used cross-platform. Luckily with RND comes two powerful extensions. The first one is React Inspector, which is now known as React Devtools. It enables you to inspect component instances, run profilers. The other is Redux Devtools, which is a helper if you choose to use Redux as a state-management library.
The standard debugger section from web development is also part of it with the well-known tabs of Network, Console, Sources, etc.

Usage
The installation guide is straightforward. This should be the first step. After that, you open it, start your mobile application, select the enable Debug JS remotely option in the developer menu of the simulator/device, and then you are good to go.
However, in the case of using Redux, there are a few extra steps to do. You either already use the browser extension for it, so just add 1 line to your store creation. Or if you prefer to use the installed package, then you can also use that option.
There are more complex configurations, but I will not dive deeper into that topic, as for a starter, everything is set up.
Reactotron
Similar to RND, Reactotron is also an Electron-based desktop application that has been around for the same time, the last 5 years or so. As before, let’s check the first sentence on the public GitHub repository. “Reactotron is a macOS, Windows, and Linux app for inspecting your React JS and React Native apps.”
So it is cross-platform too, but can also be used for React development. Besides the obvious head start, let’s see the main capabilities. For a debugger, logging is crucial. Reactotron also supports it but in a rather different way. I will cover this in the next section.
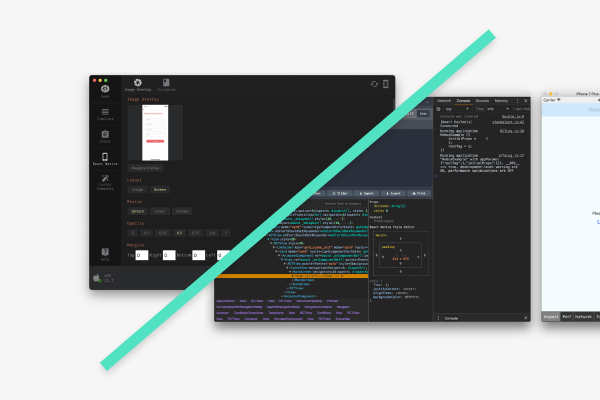
Redux state-management and even Redux-Saga are supported with the use of Reactotron. It’s worth mentioning that in contrast to RND, Reactotron communicates using TCP ports. But the one really cool feature is that it enables the developer to put an image overlay onto the screen of the emulator/device. This is incredibly useful during UI site build development.
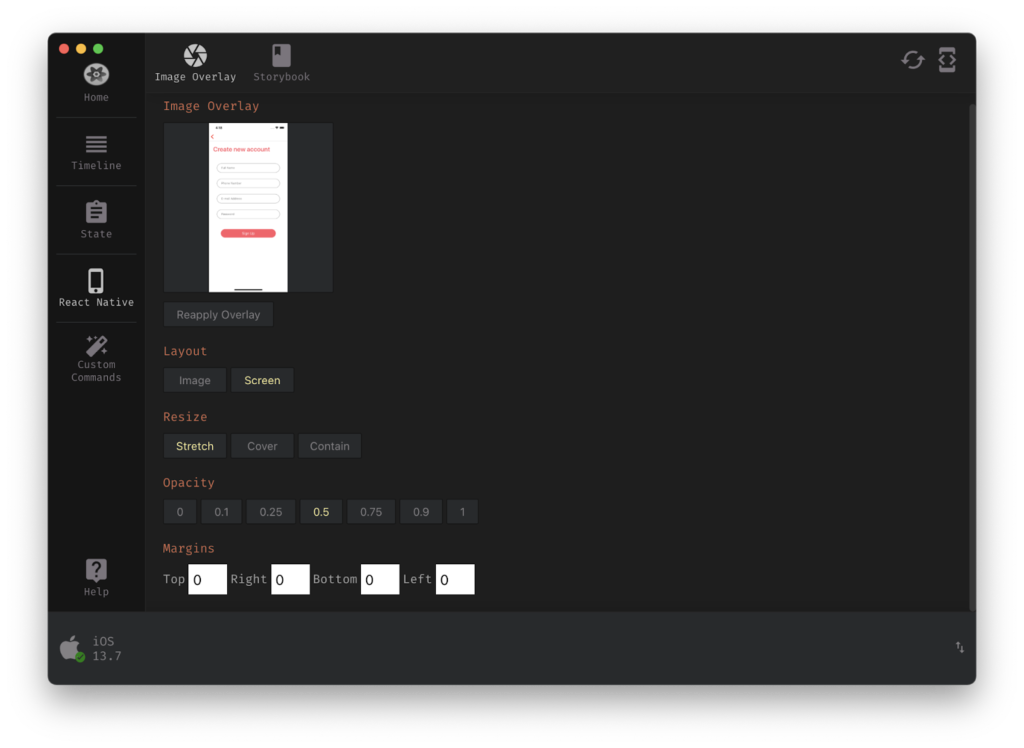
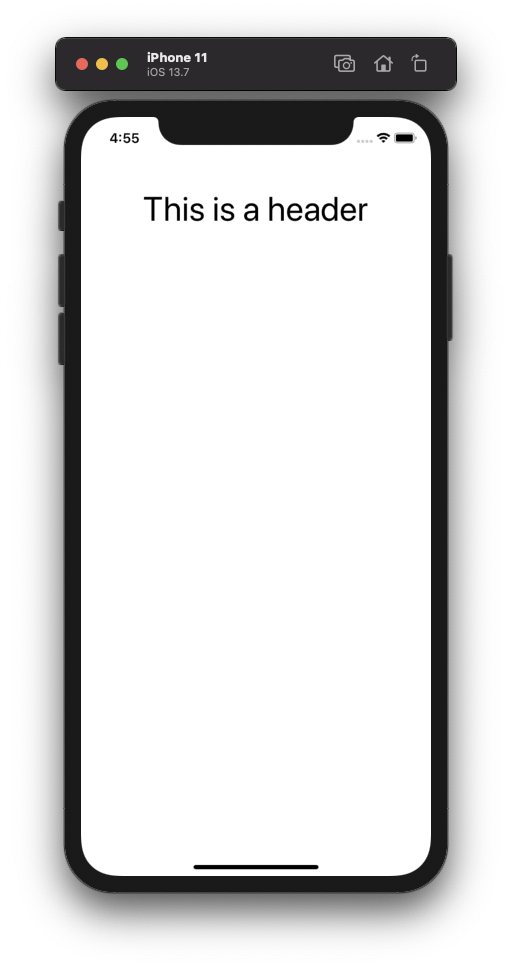
A preselected image can be drag-and-dropped into this screen of Reactotron, where opacity and alignment of the image are adjustable. Here are the before and after screenshots of a simulator showing how simple it is to develop the desired UI interface when a faded overlay is visible.
Usage
Setting up Reactotron also requires changes in the codebase. For a simple case it’s about the same amount as for RND, but for complex cases it might be a bit more.
This is a minimal setup to start debugging. Import the config file example above in the index.js. In the sample repository, a more complex version is used. In addition to the simple one, reactotron-redux also has to be installed as an NPM dependency.
Let’s see what we have done here. First of all the whole configuration is wrapped in a create function, to check if the app is running in debug mode (__DEV__ is true in this case). reactotronRedux is the additional plugin we have to provide to Reactotron to handle Redux actions. The global console object is extended with the tron property, because the logging of Reactotron is only visible in the debugger itself, not anywhere else. For the last part, the actual store creation also has to be updated.
As you can see the previously configured Reactotron instance provides a createEnhancer function to tap into the redux store.
Comparison
Comparing these two highly efficient and well-designed applications is not easy, but a list of pros and cons will help you to make a well-informed choice.
React Native Debugger
Pros:
- Has a built-in component inspector
- Minimal to zero code required to configure
Cons:
- Only one active simulator/device per opened debugger
Reactotron
Pros:
- Multiple simulators/devices connected at the same time (see android workaround)
- Overlay functionality
- Storybook support (not covered in this article)
- Easily customizable with plugins and commands
Cons:
- Regular console.log can not be seen in it, only its own log function
- More setup required (preparing it for release build)
It is also worth mentioning that React Native Debugger has only 8.5k stars on GitHub while Reactotron has almost 13k.
Conclusion
Using Reactotron and React Native Debugger at the same time is not impossible. The sample repository is configured to handle both separately or together. However, I noticed some slight interference with Reactotron when I ran the mobile application in debug mode. Not to mention you have to look at two different places to check the logs you put in the code.
Choosing between the two mentioned debugger applications is not easy. Since there is no good or wrong answer, it’s simply a matter of personal preference.
If I have to pick one for a project where extensive use of React component inspecting is required, then I would choose React Native Debugger. In any other case, my vote is going to Reactotron. I recommend that you choose wisely what is the best fit for your preferences and needs.
GitHub link: https://github.com/benestudio/react-native-debuggers
Have a question? Send them to partner@benestudio.co and we are happy to set up a talk with our engineers.
Looking for a partner for your next project? Check out our services page to see what we do and let’s set up a free consultation.
Join Our Engineering Team, We Are Hiring!